|
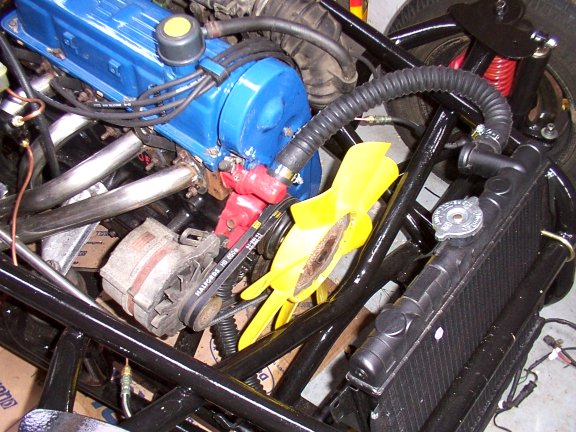
2/02/02 First off all fitted flexible water hose from Halfords on both bottom and top of the radiator. I have an expansion tank from an old cortina which will be fitted later. Next and after 3 trips to Halfords found that 850mm fan belts fitted and still gave me enough room for adjustment.
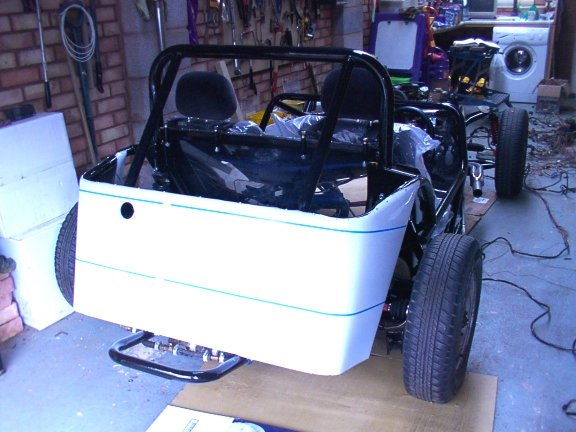
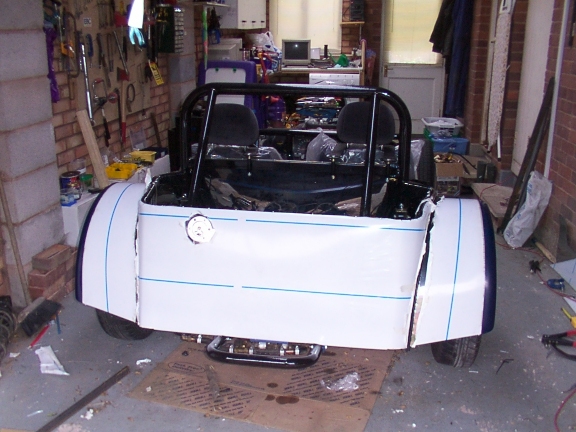
Replaced the plug leads, distributor cap and rotor arm. Rear panel next. Although I was a bit wary of bending the rear panel by 'eye' as instructed, it went quite well with no real problems. It looks quite good and now I can fit the petrol cap and connect up the fuel tank.
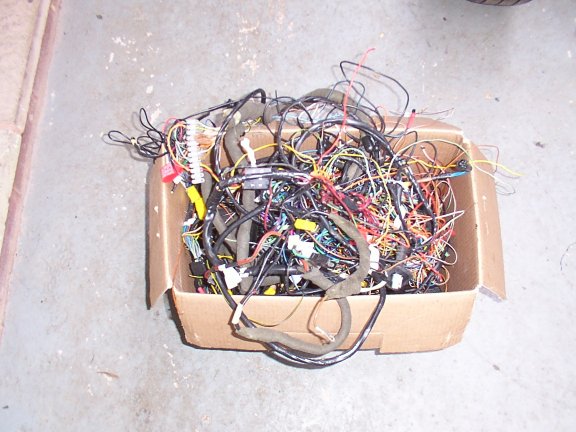
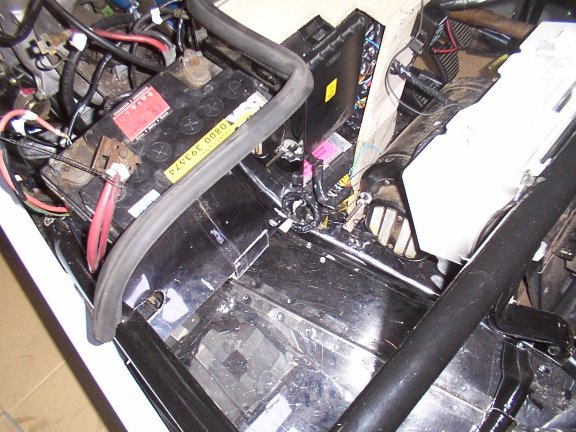
03/02/02 Now the bit I have not been looking forward to, the wiring loom. As I have the EFI 2.0, there is a lot of extra wiring since the donor strip down the wiring has been sitting in a cardboard box at the back of the garage. I spread the wiring out on the garage floor and started to identify rear left/right , front left/right. Everything else laid out in the middle. A lot of the extra stuff just unplugged, ie electric windows, centre console switches etc. However I still stripped back all the tape so as to remove the extra wiring and keep the bulk down. Now it really does look a mess and there seems to be sooo much wiring. The EMU unit is on a separate loom with a few wires going to the instrument cluster. The bulb failure unit also on a separate loom was easy enough to cut out. Hopefully I have identified where the after market alarm system was fitted and successfully removed it. Although I could well have a permanently immobilised car !. The one thing puzzling me at the moment is the LWU Lamp warning unit, this seems to be an integral part of the lamps etc and cannot be cut out simply. I have now laid the wiring over the 2B to get an idea of position and length, it is quite obvious I will have to cut a lot of length out of the loom. It is also going to be difficult to fit the large mass of wires, no matter how much I try to separate the wires, I still end up with a 'rats nest' of wires. There is one plug left over I cannot identify, but a mate at work has a EFI 2.0 Sierra, hopefully I will be able to look and find where the plug is supposed to go. Ahhh... found out what the unidentified plug was,, its the power for the wiper motor, (I will be fitting a mini wiper motor). The instrument console is now temporarily in position , on reflection, the most likely place for the Loom Fuse box seems to be behind the battery on a fabricated plate. I will have to extend the leads for the ignition cluster, but at least all the wires which need to go to the front of the car can be feed through small holes fitted with grommets. The main bulk of the wire, ie the mess in the middle !, can stay behind the firewall , feeding the EMU unit and the Lamp Failure Unit, this arrangement also give me more room to 'accommodate' the largest bulk of the wire. Finally finished off stripping out the unwanted parts of the loom, and rejoining the bits where the alarm had 'integrated' itself. It was time I put off the inevitable and tried to start the 2B. I had laid all the wiring out over the 2B having
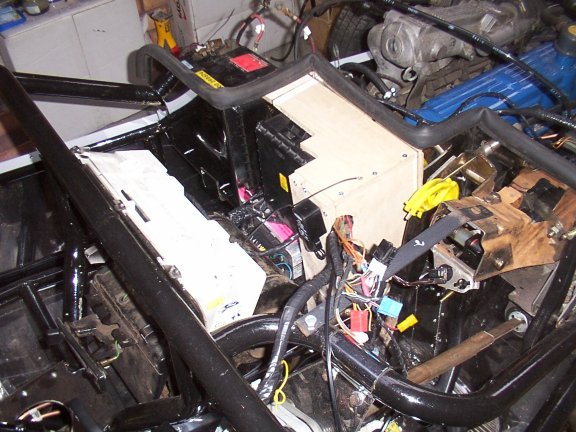
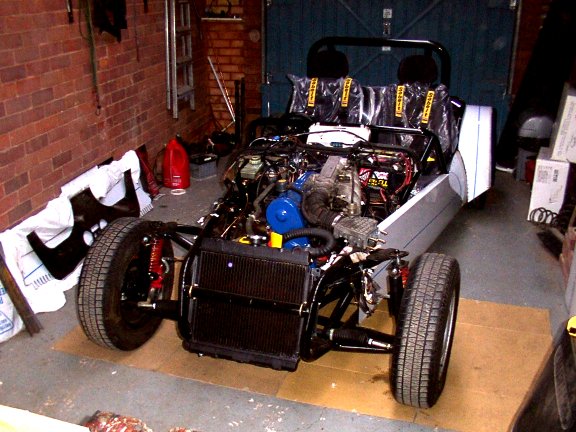
Filled the engine up with oil, checked the water level, then connected the battery. Sat in the car and turned the ignition key all the correct lights came on, ie battery, handbrake, oil etc, but at this point I should be able to hear the electric fuel pump, nothing, no sound at all. Tracing the electric's with the Haynes manual I discovered an earth I had not connected. Right lets have another go, turned the key all the lights came on and yes I could hear the pump, waited for it to stop, then turned the key a bit further… WRRRRRRR, VROOOMMMM, whahayaaa it started first time… Bl***dy Hell I should have put the silencer on, what a racket !!!. I let the engine warm up for 10 mins or so and checked the temperature, no problem there but I am still going to fit the Rover 600 Electric fan I aquired. Ticking over nicely now, water temp fine, the 4 into 1 exhaust manifold pipes are now a shitty sandy colour.. Spent the rest of the day tidying up some of the wires and mounting the fuse box behind the firewall. Next job is to cut the loom down to size and generally tidy up the loom and clip to the chassis. I have also laid in a couple of extra twin core cables for the electronic Speedo and fuel sender I will be purchasing from Greengauges . At last finally got the loom in and tidy , it seemed to take ages deciding where to route the loom and cut the various lengths down to size . A lot of the loom is much to long, so with the aid of my new soldering gun I cut down most of the loom to fit the 2B. The EMU unit eventually ended up under the battery tray in the passenger foot well. The LFU, (Lamp Failure Unit), ended up under the fuse box. The fuse box fitted nicely behind the firewall but on its side allowing me to route most of the wires within the car. All the other wires went out through the hole provided in the firewall.
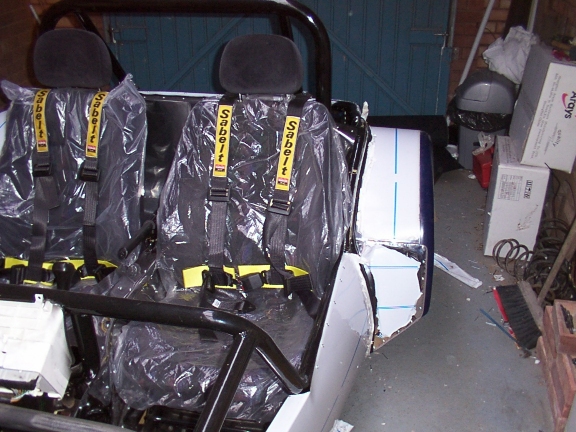
I also boxed in the area around the fuse box to tidy things up a bit using 3/8" ply. This will then be covered or painted later. With all the loom in and tidy with a coil of wire at each corner, (lights etc), I re-connected the battery, sat in the car and turned the ignition key, Vrrrroooom, great it still works !. This time I remembered to put the silencer on first. I have also connected in the inertia switch for the fuel pump, this will sit in the boot eventually, (at the moment it is just hanging under the car). I could not resist a little play so I drove the 2B up and down my small drive, felt great , I think the noise of me constantly revving the engine annoyed the neighbours though. 17/02/02 Decided to have a go at the nearside, side panel today. Being a bit worried about getting the curve right in the rear of the panel , I decided to make up the rear wheel arch first . This went without any problems, just follow the video. Then I clamped the rear arch in place, and then offered up the side panel. After removing a couple of bites from the panel it fitted nice a tight at the front. A few self tappers later and the front was fixed in place. Now the tricky bit, slowly I bent the panel round until the bottom of the panel was as far under the car as I dare. Then I used a trolley jack to 'clamp' the bottom of the panel up under the car, this meant I could pull the panel in and out as I tried to form the bow. Now by pushing down on the top of the panel I could form the bow to fit the wheel arch, which is no where near as much of a bow as shown on the video. Once the shape formed itself to match the arch, I put a self tapper in the top of the panel. It was now simply a case of adding the rest of the fixing screws
The arch is still just clamped in place at the moment, I need to bend some of the tags in a bit more and fit the piping. I am quite pleased with the position of the arch , it fits exactly central over the wheel and it looks like there is enough depth for the wider wheels and alloys I will be fitting. A good tip is to use plenty of masking tape stuck onto the panel around the wheel arch area, otherwise you will scratch the panel through the plastic coating. It is surprising how sharp the edges of the wheel arch 'tags' are. Now that the offside rear arch and panel were in place, time to have a go at the wing piping and stone guard. I started off with the wheel arch held in place with clamps then marked all the tag holes on the body and side panel, removed the arch and drilled all the holes. Now I put the arch back on and clamped it into place. Now to insert the wing piping and pop rivet the lot together. I found it quite difficult to feed the stiff piping in and hold everything together at the same time. The best solution seemed to start at the back and poke something sharp though the tag. Piping and out though the other hole, then pop rivet though the lot, then move along to the next tag, feeding the piping in as you go. I found that all the tags could be pop riveted from inside the wing, (with the wheel removed of course!). The side panel pulled up nice to the wing as did the rear panel. Right now onto the stone guard, oh by the way during all this you need to peel back the white protective coating from the edges of the wing and panels. Otherwise it is a bugger the peel off without leaving a jagged edge. Where was I?, oh yes the stone guard. I had mage sure the wing piping was proud enough to also allow for the extra thickness of the stone guard, then cut a piece of cardboard, (Corn Flakes box), to shape and cut the stone guard. It has been fixed in place with a few screws at the moment, ( I ran out of pop rivets). I used the edge piping from RHE to go around the edge of the stone guard, but it looks odd because it is a light brown colour.
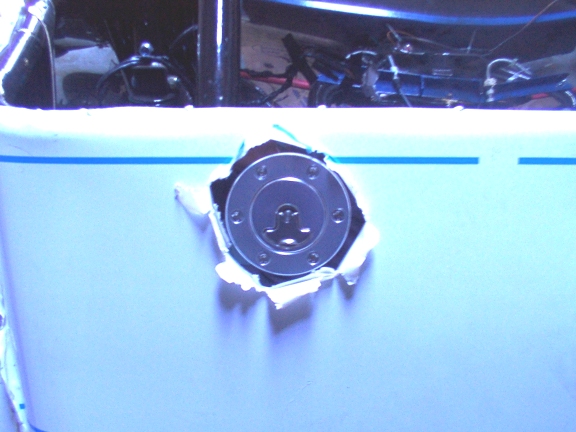
Next I made up the near side wheel arch ready for the side panel tomorrow I noticed the GRP was about 1" shorter on this side, I assumed this was to allow more room to get the exhaust silencer on past the bottom of the wheel arch. 24/02/02 To fit the near side panel, I had to remove the 4 into 1 exhaust manifold first, to do that I had to remove the steering shaft!. I now found it very difficult to feed the exhaust though the side panel even with the panel just loosely in place, but eventually after a few cut knuckles and more scrapped paint work it went in. The position of the exhaust hole was fine and I started to attach the side panel. This time the job seemed a bit easier having done the offside, as before I clamped the wheel arch in place and let the wheel arch determine the 'bow; in the side panel. Everything went as before without any hitches. Time now to fit my Areo style fuel cap, (with integral filler). This was simply a case of enlarging the filler hole and fixing the cap in place, then connecting with the special flexible filler hose.
I now have both wheel arches on, stone guards, and filler cap. I also have several cuts on my knees where I have knelt on pop rivets/screws , minor cuts all over my hands and neck ache from crawling around underneath the car and wheel arch.
|

![]()