|
02/08/03 Still determined to sort out the ignition problems, I managed to get hold of another ,(working), dizzy and ballast resistor. As I was still a bit fed up, all I did was plonk the replacement dizzy in, set the static timing, connected the leads, turned the ignition key and guess what…. Fired up first time and sat ticking over like a kitten. !!. All that trouble because of a fundamental problem somewhere in my dizzy.
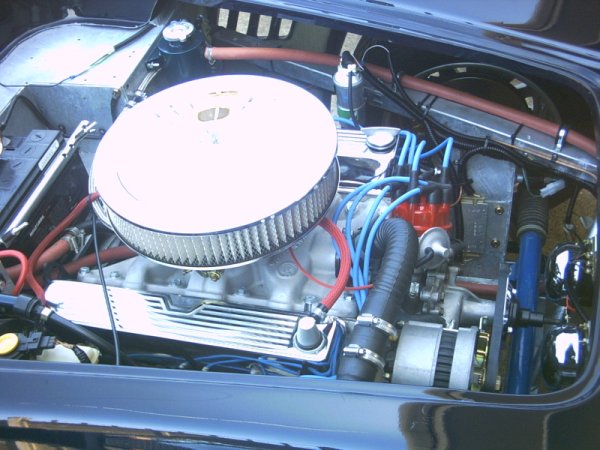
My euphoria however was soon diluted when I noticed hardly any oil pressure, bl**dy hell what next. I was only getting 5 psi on tickover and 8 psi Max when revved. Something strange here, how come I had suddenly lost oil pressure, the engine had hardly been run. ? This is a new recon engine so can’t be a bearing problem, and besides I wouldn’t lose all pressure across the range. I decided to drop the sump and check for a blocked pickup pipe. Well sump off and nothing untoward inside, (I checked to see I did in fact have new pistons, bore and bearing, not that I am paranoid you understand!), so what next?, I cleaned everything up and replaced the sump, then removed the oil pump. The inside of the oil pump was very scored around the relief valve bore and the front face. Still I replaced the valve and spring as well as the gears. Reassembled the pump ,(primed with Vaseline), and tried again. Nope still the same, well a couple of psi more. The only thing I can think of is that the pump is knackered so will order another one, there is a bit of scoring in the pump body, (part of the timing cover), but I would have thought a massive amount of scoring and hence clearance would be needed to lose this much pressure. I have a feeling the relief valve side of the pump is doing bugger all in the way of holding pressure. Well until the pump arrives at least I can drive the Cobra in
and out of the garage.
Too hot last weekend to work on the Cobra, so had a rest and thought about the oil pressure problem a bit more, also there seemed to be a problem with No4 , the spark plug keeps fouling badly with oil, can anything else go wrong !!. Meanwhile I made up a guide for the clutch cable, it had started to rub on the edge of the bell housing so I made a plate with a rubber grommet in the middle which bolted across the entrance hole in the bell housing. Then also made a guide out of copper pipe to ensure the cable passed through the exhaust manifolds with touching anywhere. Right now to replace the oil pump, the new oil pump also came fitted with the new style Rover Oil pressure switch, so left that in place as my ETB oil pressure gauge is a combined oil pressure transducer and switch, (it also fitted in the other hole). Removed the old pump, filled with Vaseline ,(again getting good at this now), then removed the dizzy and spun the pump up with the electric drill. Bugger it , still very little oil pressure !!, this cannot be everything has been replaced. The oil light only goes out when revved and the pressure only reaches 8 psi max, on tick over the oil light is on constantly, and this is with cold oil. In desperation I moved the oil pressure switch wire over to the new Rover switch, and guess what, no problem the oil light goes out as soon as the engine starts turning over and stays out until stopped, despite the gauge reading little or no pressure. So it looks as if my sender unit is duff. A check in the rocker cover shows plenty of oil reaching the tappets. So all this time and there always was pressure, just a fault sender unit. I rang ETB who suggested the sender was blocked and would send me another one a.s.a.p. I was feeling much better now but remembered the problem with No4 plug, so further investigation needed. I checked the timing with my new timing light, (thanks Tim), and tried to adjust the mixture but the right hand bank of cylinders would not run right, this was obviously because of No4 playing up. Removing the plug revealed a very wet oily plug. Hmmm, perhaps there was no spark, checked that , plenty of spark, so starting to get worried I borrowed a compression tester. To my great disappointment all cylinders were fine except No4 , hardly anything at all !!, oh dear looks like a ring has broke S**t. In preparation for the engine strip down I removed the rocker cover, and to my delight saw that No 4 rocker arm, (inlet) had snapped completely in half !, so the valve was not opening at all, no wonder the pressure was low, no air or fuel getting in on the suction stroke, easy to fix and the rocker arm only costs a fiver.
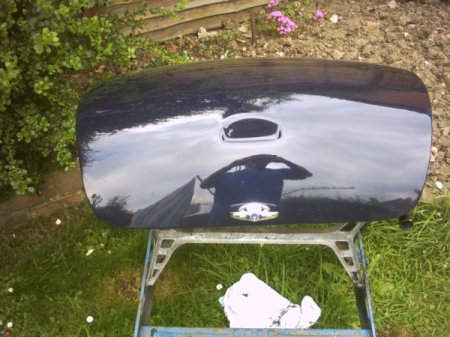
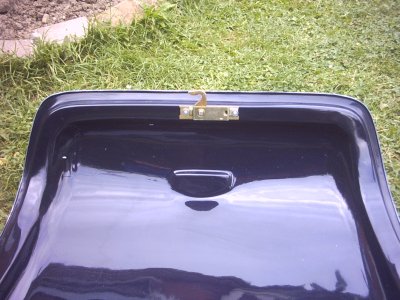
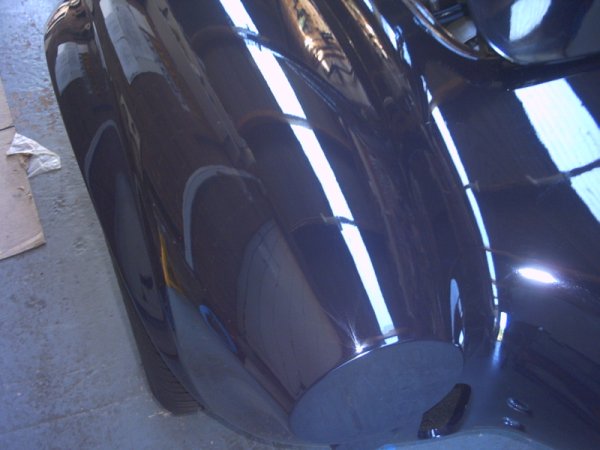
So now in a better frame of mind I started on the boot lid, first out with the angle grinder to trim all the excess flash by the time I had finished I looked like one of those old ladies just after a 'blue rinse', the stuff gets everywhere, (unfortunately I did this in the back garden and go some on the wife's washing ,,oopps). Next the boot catch, a bit scary drilling my first holes in the body parts, still very carefully I drilled all the relevant holes for the T handle and catch, it looked quite good.
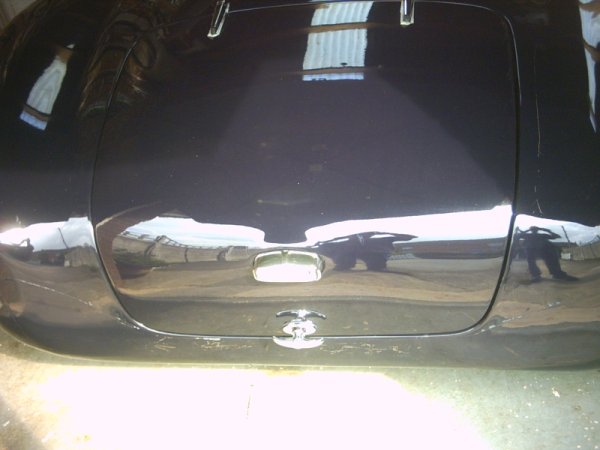
The new rocker arm arrived the next day long with a new post, (I bust one of the old ones trying to get it off !), and a new shaft, (I bent that as well !). All went together well and solved my missing problem, sounds great now all 8 are firing. The boot seems to fit quite well, so it was simple enough to fit the two hinges, the hinges require 2 off 5/16 UNC and 4 off 1/4" UNC, nuts not included with the hinges. I tried fitting the rubber door trim from a Sierra but it proved to be too thick and cumbersome stopping the boot from fitting very well. I shall probably use http://www.woolies-trim.co.uk/ to sort something out. The number plate light also simple enough to fit.
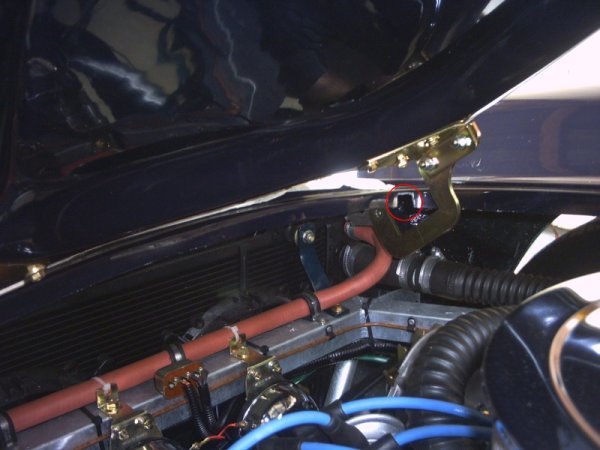
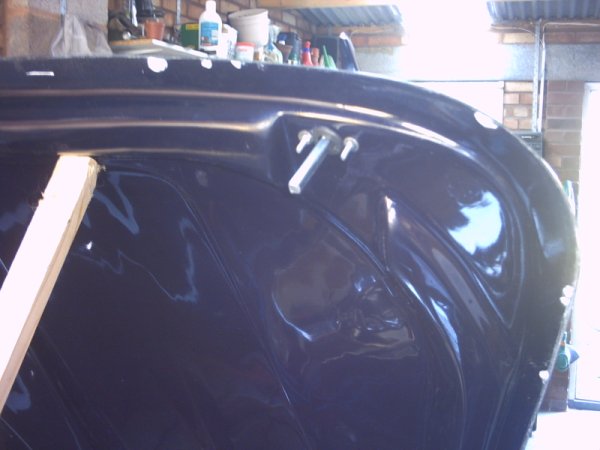
Now for the bonnet, first I sanded down all the extra 'flash' around the edges with the grinder and finished of with the sander. The air scoop hole took a bit longer, the only way I could cut out the hole was to chain drill around the edges then use a hacksaw blade to cut the majority of the fibreglass out. A file finished off the job. With the body off, (the wife is developing here biceps nicely now), I crawled underneath with the bonnet in position,(held in place with masking tape), then positioned the hinges. The glassed in mounts were spread outwards and had to be bent into position, then with the fixing plates in place I marked the fixing holes on the bonnet. There are two holes for fixing the hinge I found that I had to use the front hole else the fixing plate would miss flat fixing area on the bonnet, (behind which is a metal plate glassed in). Off with the bonnet and now the scary bit, drilling the fixing holes but though the inner skin and metal plate only, without 'bursting' through the outer skin of the bonnet !. I played safe and taped a few nuts up the drill shaft leaving only just enough drill length. No problems and back on with the bonnet. With the brackets fixed to the bonnet it was time to see if the bonnet opened properly. Nope.. the front lip kept catching on the body stopping the bonnet opening, I had to raise the front up a bit on the hinges, this then allowed the bonnet to open but spoilt the lay of the bonnet. Then I discovered the bonnet cannot open very far as the hinge fouls on the body. Looking in the Pilgrim brochure I noticed they had cut a couple of slots in the body for the hinge to clear. Out with the hacksaw and all was well.
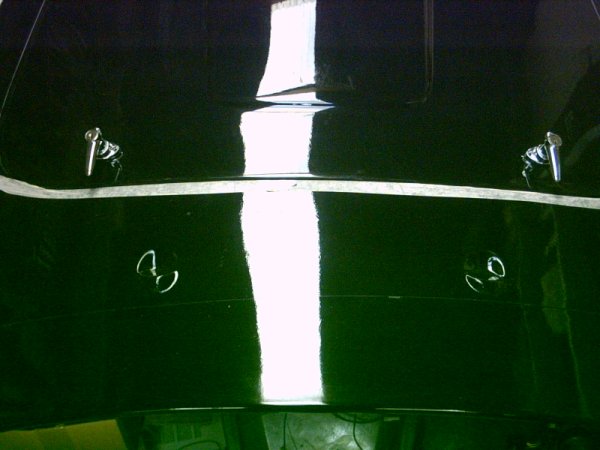
It is obviously going to take a few attempts and slight adjustments to get the bonnet to open and fit nicely , I have yet to fit the rubber seal and bolt the body down, all which will affect the fit. While the body was off I also drilled out the clearance holes for the top seatbelt mounts, and fitted 7/16 UNC bolts, also the two holes for the seatbelt inertia reels. Finally I fitted the two 'T' bar catches for the bonnet, deciding where they should go was simple enough as there is a flat area on the bonnet underside. I used the cams as a measurement from underneath the mark the hole positions, ensured they were equidistant from the center and drilled a couple of pilot holes. I will used some stainless angle fixed the the scuttle bulkhead for the cams to locate on. Slowly opening out the holes with a round file until the catches fitted took about an hour.
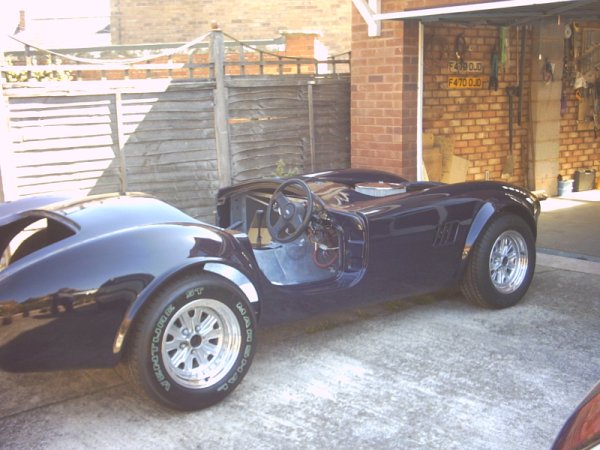
For the first job I decided to adjust the bonnet fit whilst on the body was on the chassis, no problem really and I found that it is quite easy to get at the two fixing points under the nose. Some small adjustments were made and the bonnet now ‘lies’ quite well. This will do until I fit the rubber seal. I did not like the idea of the two bonnet catches just being
secured into the fibreglass skin of the bonnet, so I made up
some small spacers from tube to fit between the two skins, and
then passed small bolts all the way through both skins. Nice
and secure and much stronger, I also used a grommet to tidy up
the inside skin hole.
I now wanted to start fitting lights thus enabling me to further test the electrics. However this meant removing the flash line around the relevant area’s. I had been worried about how to successfully get rid of the flash lines so decided test the theory on an area I would be removing, ie the middle of the headlight area. I first rubbed the flash lines down with 1200 wet and dry, using a bit of 600 on the stubborn ‘lumps’ of gelcoat. Without too much effort the flash lines rubbed down very well. Now I had a nice flat, smooth but very dull area. So
I used G10 rubbing compound and a polisher, then G10 . The
result
was better than I expected and gave me the confidence
to have a go at a ‘proper’ area, ie the areas around
the Headlight and indicators. Using the same principle I am very
pleased with the result, the flash lines have completely disappeared.
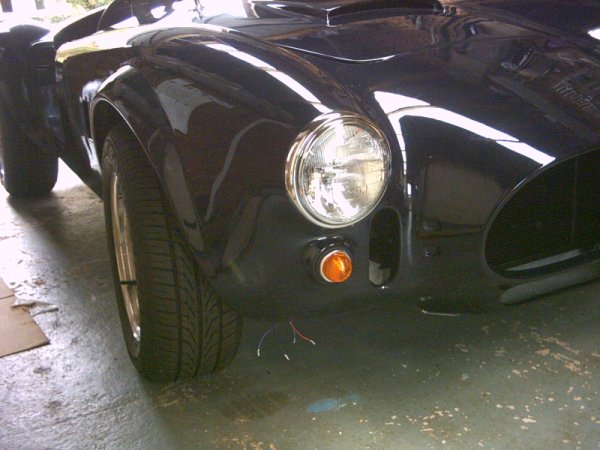
It is quite a laborious, messy and boring job removing the flash lines so I intend to remove the flash a bit at a time, just in the areas I am working at the time. So having cleaned up around the headlight and indicator I decided to fit them both. The rubber seal served as a template for the headlight hole,
two minutes later with the jigsaw and the hole was ready. The
headlight is simple enough to fit and comes with all the required
fitting screws. The indicator fitted even easier , the overall
effect is quite nice.
|

![]()