
|
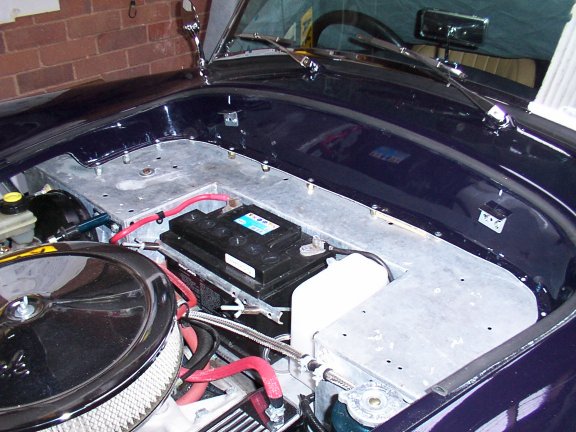
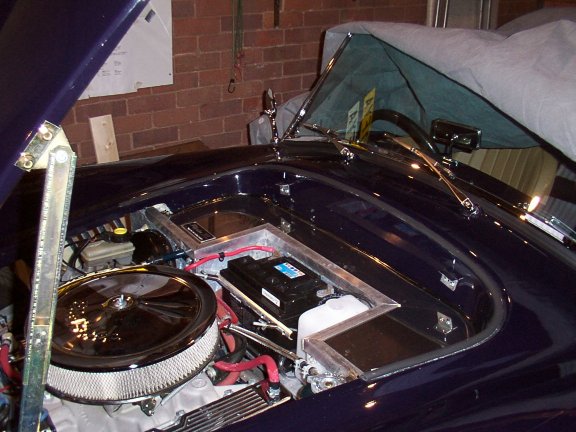
08/02/04 Just the tidy up jobs before SVA now, so time to fit the stainless bulkhead cover. The body had to be raised by about 20mm on the offside, this now leaves a large tapered gap between the body bulkhead 'lip' and the chassis bulkhead. The stainless sheet is great for hiding this gap and covering a multitude of other sins, but how to fill the gap?. In the end I decided to use the spray expanding foam sold at B&Q, this stuff is meant for filling in large gaps or holes in brickwork and the such. So first off I cut a cardboard template for the cover, once happy with the fit, transferred this to the stainless sheet. Next I sprayed the foam all over the surface of the bulkhead, then as it started to expand, placed the sheet into position. After a while the foam appears out of the edges and everywhere else where there is any sort of a hole or gap. Once dry I simply cut the excess foam off with a Stanley knife. The stainless sheet was now nice and flat and feels very solid and well supported. The edges were then covered with some ally angle.
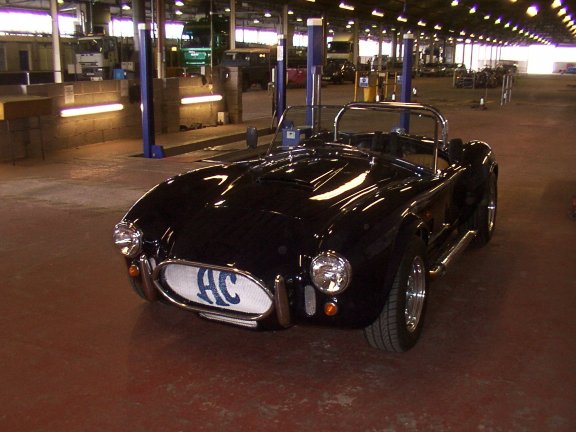
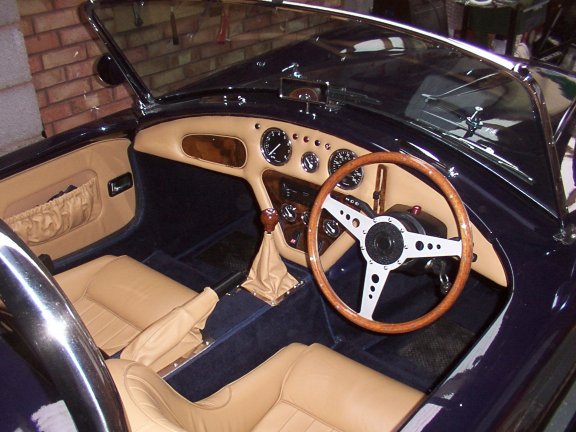
Next job, the rear inner wheel arches, I had been putting this one off as I hate, I really hate fibre glassing, still it has to be done. The Pilgrim inner arches fit fairly well with minimal trimming, held in place with a few rivets and then fill in around all the edges with fibre glass. God I hate this stuff, it ends up running down your arm and sticking to everything in sight, but after a while the first one was firmly in place. The onto the other side, did I say I hate fibre glassing ?, horrible job. Once that was complete and I had managed to un stick my tools from the garage floor, time to fill in the front of the wheel arch, (the hole that lets you see right up inside the body. The simplest idea to me was to cut out some chicken wire and bend/form to shape, then yes you guesses it, fibre glass again!. I did the same for both sides covering the chicken wire with fiberglass. Once everything was dry I used 'Wonderseal' around all the edges, and finished off with normal underseal all around the inside of the inner wheel arch. Now the boot had sides and is waterproof the next job will be to fit the boot carpet. 17/02/04 Great news, SVA date id next Tues, Feb. 24th, although not needed I have booked an MOT for this fri just to get a change for a decent test run and get the essentials checked. On the way back from the MOT I will get the tracking setup and fill up with petrol ready for the day. I also need to check the Speedo is working okay. As for the remaining 'little' jobs, the front and rear arches have had the 'gap' filled but I have left out the inner front wheel arches until after SVA. I also made some side panels for the area behind the centre of the dash, this hides the heater and hoses quite nicely. Bit of a pain at the moment as I am working away in Crawley, but I have Monday off work as well, so that gives me the plenty of time over the weekend to fit the Pilgrim SVA kit and cover all sharp edges etc. A bit nervous about driving to the test centre, after all you loose your fee if you don't make it to the test centre. Next update after SVA... Whaaaahay, straight through the SVA, brilliant. Went for and MOT first and was well disappointed with the fail due to a couple of nuts on the suspension I had forgot to tighten, but most worryingly emissions failure, hydrocarbons on one bank were off the scale, although Co was fine. The tester said something was wrong as this usually means un burnt fuel. Despondent I went home and pulled the plugs, hmmm one plug was a bit wet and smelt of petrol, replaced it and fired up, the engine sounded better so let's hope it's okay for the SVA, nothing else I can do now. Set off for the test at 7.00 a,m, (Taunton SVA Centre),the boot filled with just about every tool I own, duck tape, sticky back foam, tyre weld, tow rope, etc, the list goes on. Absolutely freezing, at least the heater works fine, on the way the fan belt starts squealing like a stuffed pig, blast.. still quick five minutes by the side of the road and I managed to tighten it up a bit. Arrived in plenty of time and topped up with Petrol. The examiner introduced himself and started looking over the Sumo, at the same time he commented that I would not be able to use duck tape or stick foam an any exterior sharp edges, as this was now not allowed, bugger, lets just hope I don't need any. Fist test, the Emission !, oh dear lets hope I had sorted the problem, yep no problems at all, he even let me tune both sides. This is basically how the rest of test went he was very helpful and explained he was not here to try and fail the car, just make sure it complied sensibly with the rules. commented I would love to borrow some car ramps at some point to go around under the Sumo with my Silicone gun, to seal any gaps I had missed. 'No problem mate, when I go to break I will leave you car up on the ramps for you', what a nice man. On checking the tyre's he commented that one tyre was strong enough to support the whole car ! I put the max power at 3850 on the application form so he tested the noise levels at 2,800, no surprise it passed at 94dba both sides. The ETB calibrated speedo was spot on , brakes perfect and that was it , all over in 2 and a half hours, result.... To celebrate when I got home I fitted my nice new steering wheel.
All in all a very pleasant experience, now to sort out the number plate.
|
![]()