|
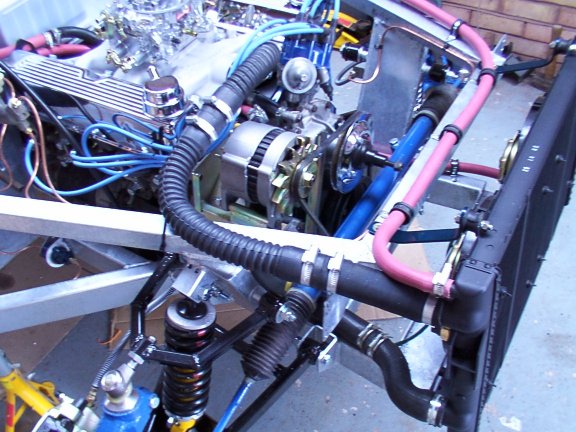
07/06/03 Got all the stuff required from Real Steel during the week to attack the plumbing. Needed 18ft just for the 5/8" heater hose. I figured the top rad hose could be made from a couple of the flexible stuff from Halfords. The bottom hose can be made from bits of the original top and bottom hose from the SD1. Well easier said then done, it took a couple of trips to back and forth to Halfords before I could make up a top hose and even then it didn't quite meet. I ended up adding a bit of straight the fill the gap. It all looks a bit heath robinson with all the connections but this will only be temporary until I am sure the hoses do not foul anything, then once the body has been test fitted I can replace with Blue Silicon bends and polished aluminum joiners.
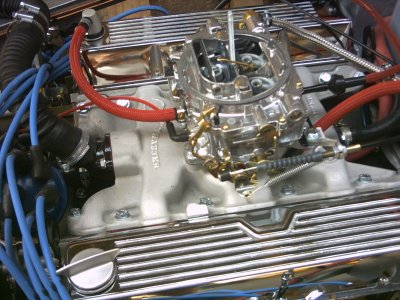
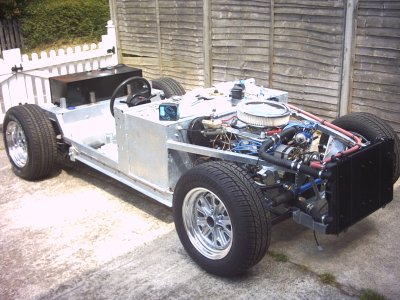
As you can see from the above picture, the filler hose from the header tank, (still not arrived from Pilgrim), was a simple job to fit both top and bottom runs. The top hose goes to the to top the header tank, whereas the bottom hose goes to the bottom of the rad for filling, the theory being that the as the system fills up from the bottom the air is pushed up into the header tank via the top hose. The header tank remains about half full when the system is completely full of water providing a reservoir for the air. The large bottom hose on the rad is fed from the water pump, the large hose at the top of the rad goes to the thermostat housing. There is also a small pipe from the the water pump housing which provides flow for the heater, the return of which goes to the back of the inlet manifold. Now there is one other small pipe which goes from the back of the water pump housing to the bottom of the thermostat housing, providing a bypass until the thermostat opens. This pipe is a b*****d to fit !!. It is only a few inches long, but has to be bent to fit into a very small area. The only way I managed it was to remove the thermostat housing, fit the pipe then re-fit the housing.
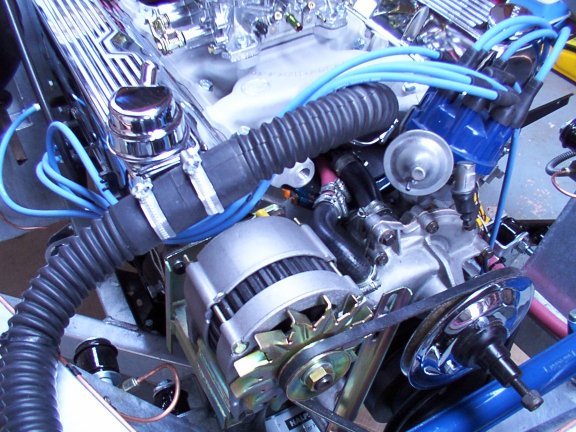
Well that seems to be all the water plumbing sorted. I have a heater from a VW Polo, this needs to be fitted next, normally a heater from a Mini is used but I found last time the mini heater to be a bit pathetic. Anyway I have yet to figure out how to fit it.. Lot’s of ‘little’ jobs to sort this today whilst waiting for parts from Pilgrim. First off sort out the crankcase gas venting. On the Rover Positive Crankcase Venting is required, otherwise gas pressure builds up inside the engine and horrible oily deposits appear around your nice clean engine, wherever the gasses were able to get out. So the method I used was to ‘suck’ from the from vacuum point on the Carb , through a PCV ,(Positive Crankcase Vent), valve in the top of the offside rocker cover . Clean air is then drawn in though the nearside rocker cover via the air filter. All well and good but I had to make up some fittings. I got
a PCV valve from Real Steel , but it was too small to fit into
the rocker cover filler hole. I noticed however the inside of
the tall filler neck from the rover was the correct diameter,
so I cut off the bottom few threads, fitted the PCV valve inside,
then screwed the valve in with a bit of Araldite around the threads.
Looks quite neat.
For the other rocker cover, a short length of 8mm copper pipe fitted into the little hole at the rear, the pipe was then connected to the outlet under the bottom of the air filter. That should sort the crankcase venting. Next
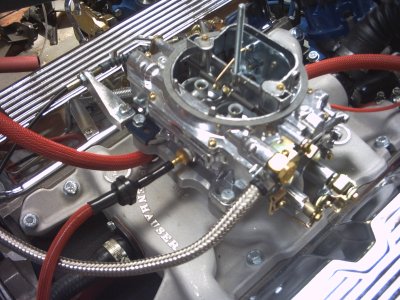
the brake servo, this was a simple case of re-using the original
vacuum pipe complete with non-return valve. Just connect
the pipe to the vacuum port on the back of the carb.
You will also notice from the above photo, the fuel line inlet has been changed to a Banjo connection as I found the pipe fouls the underneath of the air filter. The banjo fitting came from real Steel. Now for the accelerator cable, I tried to make a standard Sierra/Granada setup fit but gave up in the end and bought a universal accelerator kit from , yes you guessed it, Real Steel . The Carb end fitted perfectly as you can see below.
but the pedal end I modified the normal connection through the bulkhead as used on the Sierra. Just drilled out the plastic tube to take the threaded adjuster and fitted a ‘sleeve around the ball, job done. In the above photo you can see that I have re-used the standard filler cap, just cut away the horrible orange plastic, polished it up and shortened the neck. I think it looks okay and matched the PCV valve. Fuel line
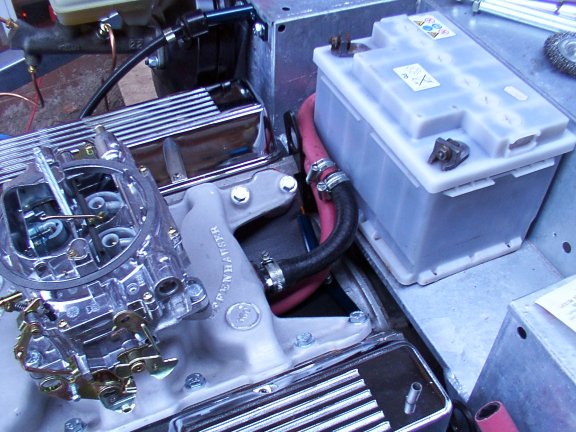
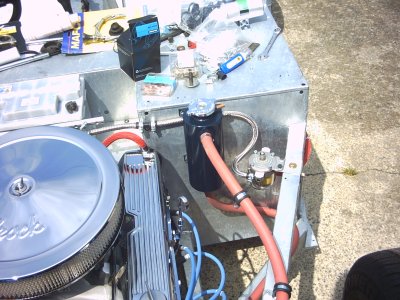
next, no problems here, I fitted a ‘Filter King’ filter/regulator
on the chassis and ran the 8mm copper pipe down the nearside
to the rear.
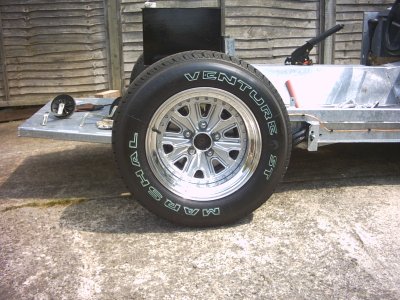
To mount the pump I used a coil clamp which fitted perfectly. Hurray !! some of my missing parts have arrived from Pilgrim, ie Petrol tank, Expansion tank, Handbrake cable, Halibrand Wheels and best of all the Wiring loom. So first off fit the handbrake, hmmm turned out not to fit has well as expected, the cable is actually too long by just a tad, leaving no adjustment. Fixed the problem by making up a bracket to 'pinch' the cable together just after the half moon guide , this effectively reduced the length giving me enough for adjustment, now works fine. This now meant I could now fit the propshaft, no problem fitted as if was made for the job :-). After that fitted the Petrol tank, (painted last night), again, no problem, then connected up the fuel hose and filter.
I must say the Halibrands loom very nice and a quick trip up town to get the tyres fitted and couldn't wait to stick them on.
Fitted the expansion tank next, but had to trawl through all the radiator caps in Halfords to find one that fitted, turned out to be a Cortina cap (15 lbs).
Finally time to fit all wheels and lower down from the axle stands. At long last I can say I really do have a 'rolling' chassis!.
|


![]()