|
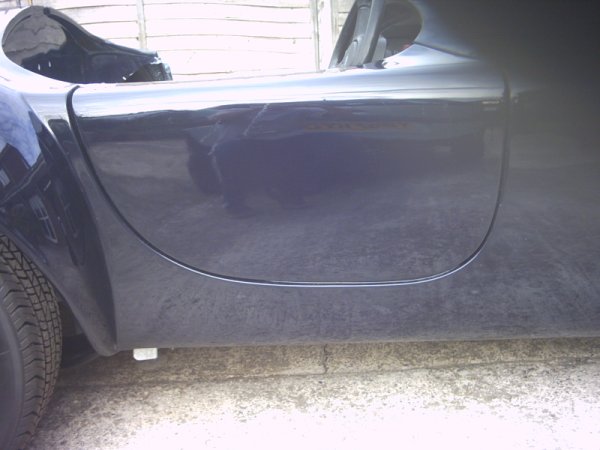
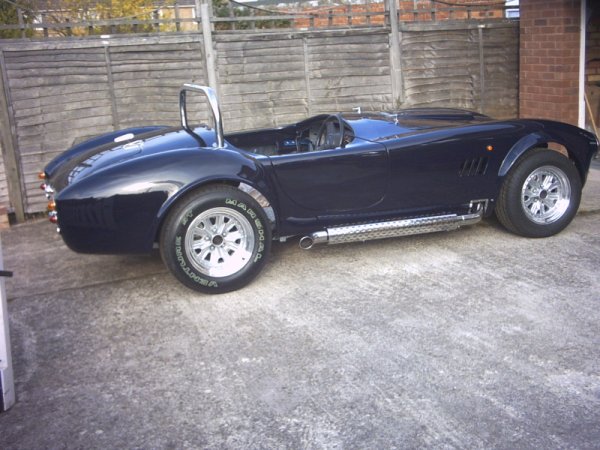
05/10/03 Had a parcel from Pilgrim today, I had forgotten that they had never sent me the steering column extension, I had since made up my own !. Still at least I have a spare now. First job of the day, double check the alignment and bolt down the body permanently, first the back, no problems here, I am using ACME screws which are basically 6mm self tappers with a 10 mm head. Then across the rear bulkhead behind the seat area. Finally the two 8mm fixing holes at the front for the nose, everything feels nice and solid now. I was about to fix the fiberglass bulkhead flange down to the metal bulkhead floor when I noticed a problem. It seems there is a fault in the molding and one side of the bulkhead is 80mm deep ,(nearside), and the other side is 65mm deep. This is obviously why the bonnet does not 'lay' all that well, one side or wing is lower than the other. You can see the error if you bend down in front of the Cobra and 'eye' along the top of the fiberglass bulkhead curve in relation to the back bulkhead curve. I found the best thing was to put spacers under the offside flange before fixing down , this raises the offside to the correct height and the bonnet now lays a lot better. There is now an unsightly gap under the bulkhead fixing point, but the stainless steel sheet for the bulkhead cover will obviously be covering up a multitude of sins !. Door fixing, I had been dreading this but here goes anyway. There is quite a bit of preparation first , the door has to be de-flashed, holes cut out for the lock and hinge holes cut into the body. I started with the body and cut out the two square sections ready to take the hinge arms. Next de flashed the door, and then cut out the slot for the door latch, (using a cardboard template). Right now for fitting the hinge, hmm you need to be a bit of a contortionist to get inside the body and reach up to the hinge fixing points to get at the rear two bolts. I used 8mm coach bolts which fitted perfectly in the slots, not requiring me to hold the bolt head when tightening up, this helped a great deal. The hinge was spaced out from the chassis with 10mm of washers. Now with the two arms in place the door was offered up to the body, using plasticine, (don't tell my daughters !), to hold the door in place. I then marked out the holes and removed the door. After drilling the holes the door was re-fitted and bolted into place, after a bit of adjustment the door fits an works fine, well bugger me . not too bad after all !.
The body sills can now be bolted down and also help to adjust the door gap, with a further bit of fiddling I achieved a reasonably good fit, enough to keep me happy.
If I was painting the body I could get the gaps a lot better by filling etc, but this will have to do, although I have been experimenting with the tub of Gelcoat I bought with the body and it does go on very well, rubs down and polishes up fine, so I could use filler, then paint with Gelcoat, Hmmmm.
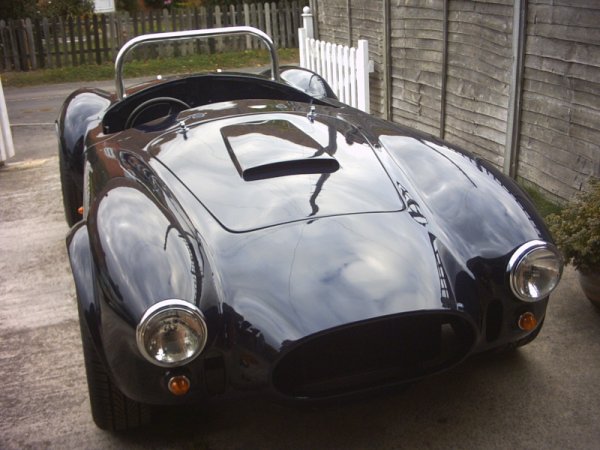
Next weekend the other door and both door strikers/catches. Had a bit of luck at the scrapyard this weekend, found a Mini which had not been completely 'raped' as normal and still had the wiper motor fitted. 15 min's later and 15 quid , I had myself a good wiper motor. Probably next weekends job. Right next job fit the other door and the door catches. This time things went a lot better and the door was soon fitted and 'gaped' as best I could. The door strikers from the donor next, the offside only needed a couple of washers to space the striker out from the fixing point, but the near side needed nearly 10mm of spacers. It was a bit difficult marking where the strikers fixing holes should go, I jammed the striker up against the door post then carefully opened the door, leaving the striker in place, after about 5 attempts, (each side), striker fixing holes were marked. Unfortunately now the original Torx screws are now not long enough, trying to find chamfered 8mm bolts is about as easy as finding rocking horse s**t. I sorted the problem by welding on a length of 8mm thread to the original screws. I now had working doors !. Now the body could be finally bolted down along the sills, after clambering up inside the wing again, I managed to get plenty of glass fibre in my arms !!, note do not do this job in a tee shirt. Decided to fit the roll bar next, hmm how to mark the position for the holes in the body. I drilled through from inside with a small drill then kept enlarging the hole, looking down and keeping the fixing stub in the center. Then tried on end of the roll bar in the hole , gradually enlarging the hole each time. The hole is actually an elongated hole because of the body curve, I ended up making the hole far too big, but the trim plate covers the excess. Now cam the problem after drilling both holes I found that no way would the roll bar fit into the holes, it appeared the roll bar was much too wide. I carefully measured the centers of the fixing stubs and then the roll bar centers, yep the roll bar was a good 20mm to wide !. I was about to send the roll bar back when I wondered if the roll bar could be 'persuaded' to fit, closer examination showed the roll bar had spread so I leaned on one end of the roll bar, and found you could bend the bar little by little eliminating the spread. This worked as I was then able to successfully fit the roll bar.
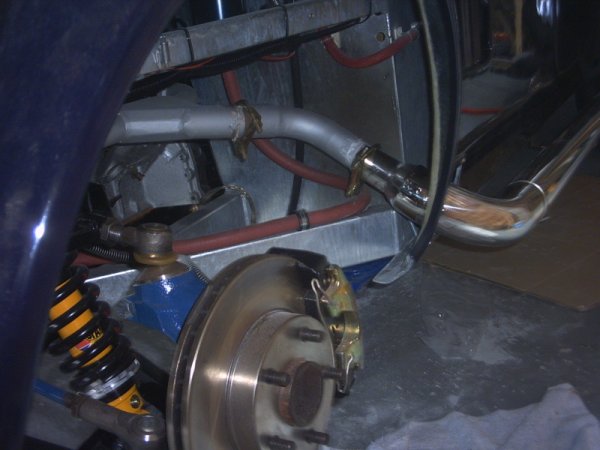
I had intended to sort the wipers and heater this weekend but during the week my Pilgrim Exhausts arrived and couldn't wait to fit them. I had ordered the baffles and heat guards at the same time, so first thing fit them together?. After trying to figure out how to fit the baffles, it soon became obvious you just bash them up into the silencer, so armed with a rubber mallet and tem minutes later both baffles inserted. The front bend now slots into place and the exhaust is assembled. First problem, where do I make the hole in the body ?. There are no measurements so I just looked at various pictures of show Sumo's and decided where the hole should go. After cutting the down pipe to size I drilled the first experimental hole, hmm locked okay so I opened out the hole to take the full dia of the front bend. My intention is to keep the exhaust level with the bottom of the chassis, so eventually by opening out the hole a bit more and experimenting with the angle of the down pipe, I found a suitable position.
Now I supported the exhaust with two car jacks and marked the position for the escutcheon plate,you have to be careful here as there is no room for error, the fixing holes for the plate are very close to the edge. The problem I now found was that the angle of the down pipe and exhaust bend are such that the silencer does not 'lay' parallel to the body, brute force is needed to persuade the silencer to fit close enough and parallel. Now while everything is in the correct place, time to make up the brackets. The design I came up with was to use a 6" length of 1 1/2" flat bolted to the bottom of the chassis, then drops down an inch to allow for the bobbin, then another piece of flat from the 12mm fixing stud on the silencer, to the top of the bobbin. This way the exhaust bottom is level with the bottom of the body, as I intended. I do not have a strong enough vice to bend the flat to provide the inch drop, so I simply welded two lengths of the flat to a piece of 1" angle to provide the required step. The system seems to work well, I will remove the brackets later to get them plated. The same procedure was repeated for the other side and both exhausts were in place. The other side was a bit easier as I had a good idea where to drill the body hole, etc. The final job was to fit the heat guard, (a 40 quid cheese grater really), these came with big jubilee clips to mount them, no problems here. Now for the big moment, I was dying to here what the engine sounded like with the silencers, so turn the key and ... fantastic, no more BANG BANG just a nice soft rumble, rev it a bit and that lovely V8 purr you often dream about, lovely stuff.
Now to have a go at the Mini wiper,after a bit of cleaning up and an electrical check I dismantled the whole system for an overhaul. One problem with the Mini wiper system is that the main gear wheel rotates the wipers through an arc of 110 degrees. That's fine for a Mini but in a Cobra the wiper blade finishes it's sweep right in front of the passengers face, now you may not want the passenger to see what's happening or how fast the corner is approaching, but I will have my wife as passenger most of the time, and she was having none of that. The solution is quite simple , the gear can be replaced with another one giving a wider arc, they are available in steps of 5 degrees, I went for a 130 degree gear, the largest sweep you can get. I got mine from Stafford Vehicle Components, who informed me this was correct for my Sumo. The gear is simple to replace and only takes about 10 min's. The wheel boxes looked okay, I just replaced the Chrome nuts. Now to re-assemble and fit the wiper system. I first drilled the holes in the body, then fitted the wheel boxes and measured up to cut the spacer tubes. The manual tells you to cut the first tube, (the one from the motor to the first wheel box), 230mm which is strange as it isn't that long !, I left it as is and it fitted perfectly. The motor is bolted up under the bulkhead rail with the original clamp. The next tube only needs about 40mm cut off and the end is re-flared with a bent six inch nail, (well it worked for me). Plugged in the connection from the Pilgrim loom and hey presto everything works !!.
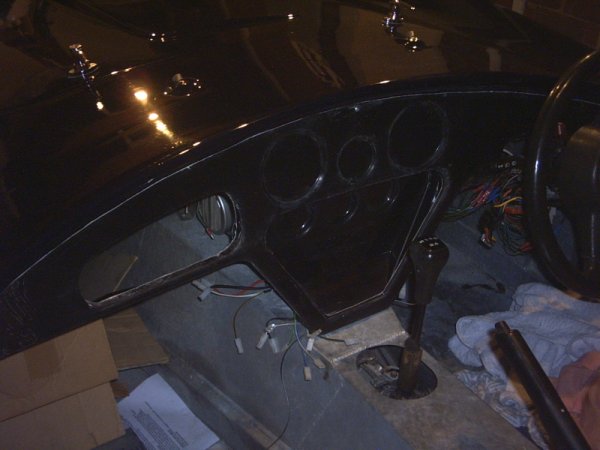
Next job the heater, now I have a heater from a Polo , which would be better than the Mini heater, but I have not yet worked out how to fit it, and I will need to make up my own 'air box'. So for now I have decided to fit the traditional Mini heater. The heater itself is a simple affair and only requires a couple of brackets made up and it it fitted. I have not bolted it down yet as it's position is dependant on the position of the dashboard as the control arm needs to poke through the dash. I connected up the heater plumbing but not bolted it down yet. I had intended to push the heater as far back as possible and control the heater buy an electric motor or remote cables, thus leaving the space in the dash for a Radio. Unfortunately there is not enough room (depth), to fit the radio in front of the heater, so I will be fitting the heater as Pilgrim intended. The radio will end up in the glove compartment, which will have a lockable door , hiding the radio.
|
|||||||||||||||||


![]()