|
07/09/03 Nice surprise this week , the roll bar and two-piece
GRP dashboard arrived this week. The dashboard is a two piece GRP molding, then center piece is recessed which helps SVA as the switches & gauges in this area are in effect recessed back from the main dashboard, getting round the 3mm projection rule. Anyway the center section will contain water temp, fuel and voltmeter gauges, and the radio along with a couple of switches. The top section of the main molding will hold the rev counter, oil pressure and speedo. The center recessed section I intend to laminate with burr walnut,the rest of the dashboard will be biscuit coloured leather. Right back to the body again, this time the other headlight and indicator. I have found that the ideal tool for enlarging ant holes in the fiberglass is one of those 'flap wheel' things from Halfords. They are basically squares of sandpaper bound radial into a disk makes a sandpaper wheel. They come in different sizes and ar very good for 'grinding' out the rest of the fiberglass when enlarging a hole, much better than a file , very quick and leave a nice finish. Be warned however, both you and the garage will get covered in dust.. No
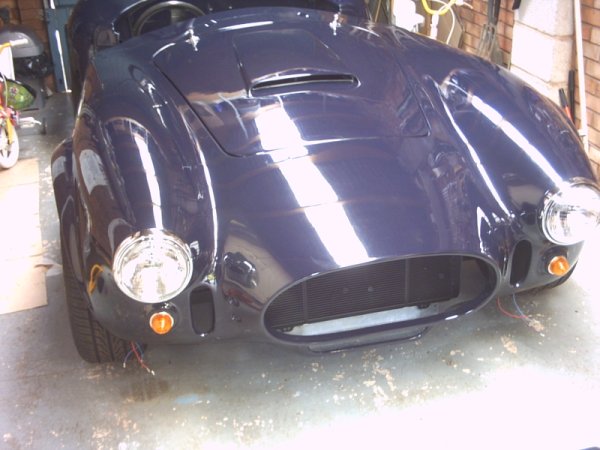
problems fitting the second head light and indicator and this
time I remembered the extra earth wire for the indicator
light, (only the live is supplied).
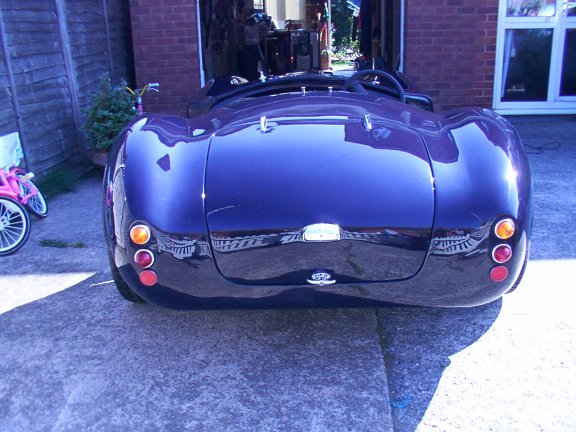
Now onto some more flash removal, using the same method of 1200 , then G3 and then G10, I removed all the remaining flash line from the wings and the nose, thus only leaving the windscreen area flash line left and the front of the body will have had all the flash lines removed. This is definitely one of those long laborious jobs that is best attacked a bit at a time just in the area you are working at the time. Not much to report this week apart from yet more rubbing down, but at least all the flash lines are now a thing of the past. There is still a bit more rubbing to do as it is still possible to see where a couple of the flash lines were. The worst to rub down turned out to be the join which runs across the back between the rear lights and under the boot, you can still see a 'witness' showing up where the line was. The other troublesome flash line ran across the top of the bulkhead , after spending all day rubbing down the flash and polishing I realised this line is covered by the windscreen Doh, still at least I know it is a good finish under the windscreen ! :-) The garage is looking quite attractive now with everything covered in a light blue dust, unfortunately the blue footprints leading ito the house are not so popular. Now I had cleaned up the rear end, time the fit the remaining lights. I could not decide if to fit the Indicator, stop/tail and reflector as one cluster, (as Pilgrim do), or fit the reflector on the ends of the rear nudge bar as so many other people tend to do. In the end I decided to fit as one cluster although you actually run out of flat area for mounting all three. If I end up not liking this setup I can always move the reflectors onto the nudge bar at a later date.
I now went over the whole body with the G10 paste and an electric polisher, then buffed up with a wool head on the polisher. The result is very good and one more final polish then wax should give a very nice finish. I just have to remember good as it is the gelcoat finish will never match up to £1500 paint job, but at least the finish is better than expected, and whenever I see another little area I missed,it's a simple case of of quickly rubbing down the area and re-polishing, much simpler than re-spraying etc.. With all the lights fitted I can now continue with the electrics, ie get all the lights and indicators working, I will also now bolt down the body ,(except for the sills), ready to fit the doors.
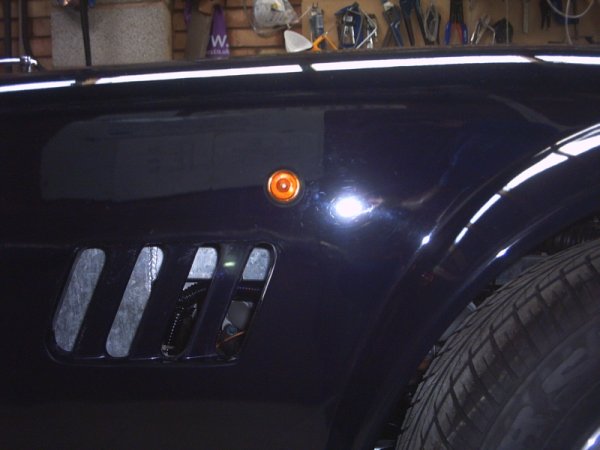
Decided to spend some time this weekend sorting out the electrics now all the lights were fitted. Correction I had forgotten the side repeaters, still no problem, just have to drill the correct size hole and pop them in, the only problem is where.. SVA requires that the side repeater must be fitted such that when viewed from the rear must be visible at a 5 degrees angle from the body. After a few trials with double sided tape I settled on a position just above the side vent.
Right now onto the wiring, first I connected up the headlights and front indicators, then ran a cable from the side repeater to the indicator supply. Next connected up the rear stop, tail , number plate and indicator lights. Now the hard part connecting up the rat's nest of wires around the steering column, the Pilgrim wiring instructions seemed simple enough so I removed the indicator and light stalks from the column. One by one all the connections seemed to match up except for one connection on the indicator/flasher stalk, there is a purple/black Pilgrim wire which should connect to a yellow/black on the 'H' terminal of the stalk . Unfortunately there is no black/yellow wire or even a connector in the 'H' position of the stalk. Oh well carry one and see what happens. Well with all the connections made I refitted the stalks and hoped for the best, first the side lights, yep all worked, headlights, indicators, flashers, brakes , and number plate lights all worked, a result !!. The final job for the day was to line up the body a mark the position ready for bolting down, with the car on jacks I tied a nut to the end of four pieces of string and taped them to the middle of each wheel arch, ie home made plum bob's. Then measured the distance from each string to the middle of each wheel hub, moving the body to ensure a central position. Once satisfied I marked the body position ready for drilling and bolting.
|
![]()